Step-by-step Instruction
Step 1: Set the settings of your SMTP server
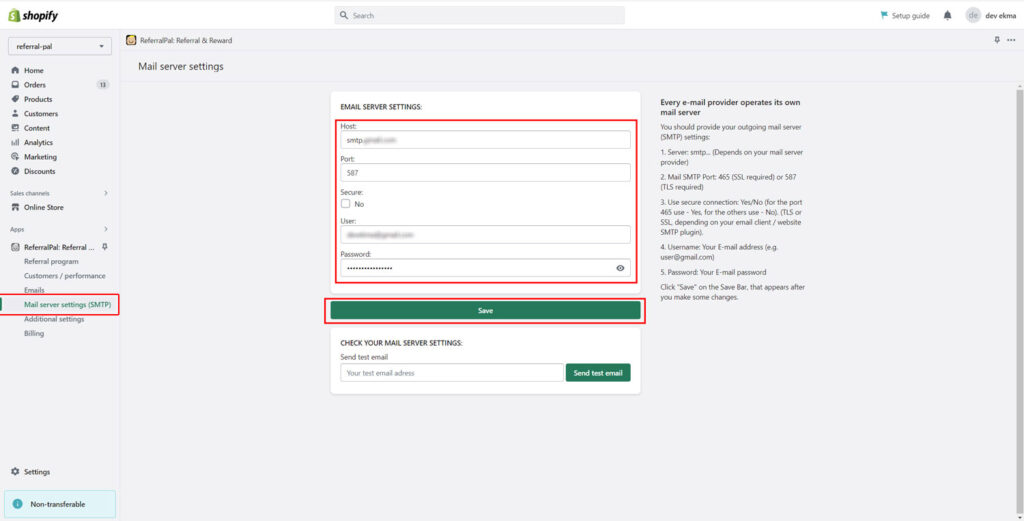
1.1. Click on this app menu ‘Mail server settings (SMTP)’.
Set the settings of your SMTP server and save them.
Don’t worry, your password will be encoded.

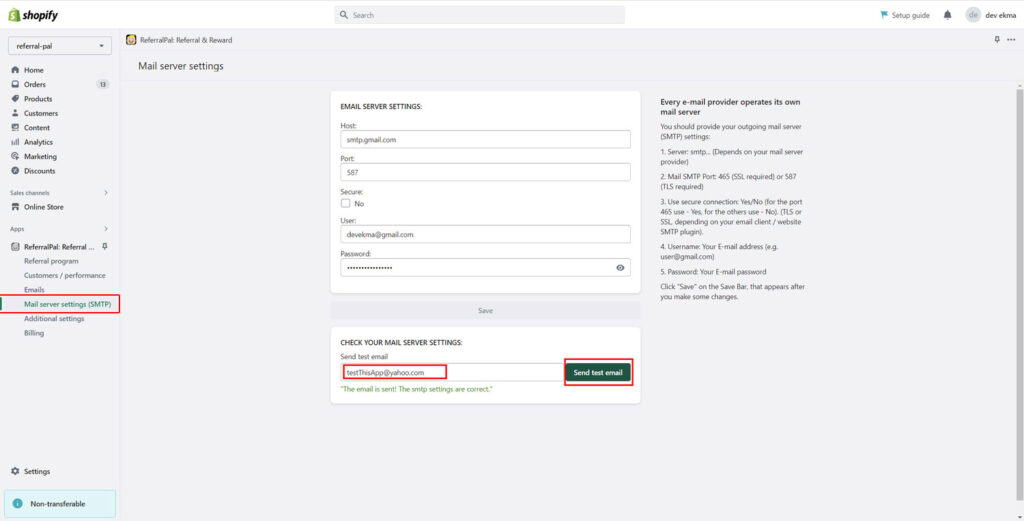
1.2. Test your mail server settings with ‘Send test e-mail’. This option is not necessary but very useful:

Step 2: Set or update the information for the ‘Friend received referral’ email
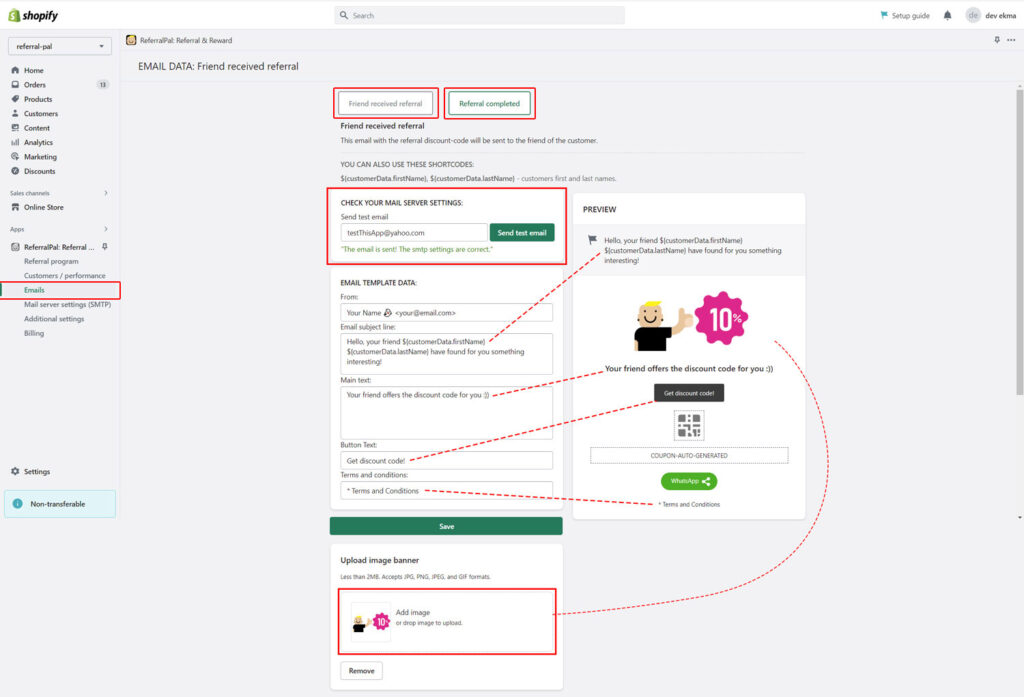
2.1. Click on this app menu “Emails”. On the page that opens, you should see the settings of the “Friend received referral” email.
YOU CAN ALSO USE THESE SHORTCODES:
${customerData.firstName}, ${customerData.lastName}
 - first and last name of the referrer
2.2. Click on the ‘Save’ button to save the changes that you’ve made.
We recommend that you test the settings of your email template in the ‘Send test email’ block.
Before you use 'Send test email' option,
you should provide the SMTP Settings of your
email server, otherwise the email can't be sent
Step 3: Set or update the information for the ‘Referral completed’ email
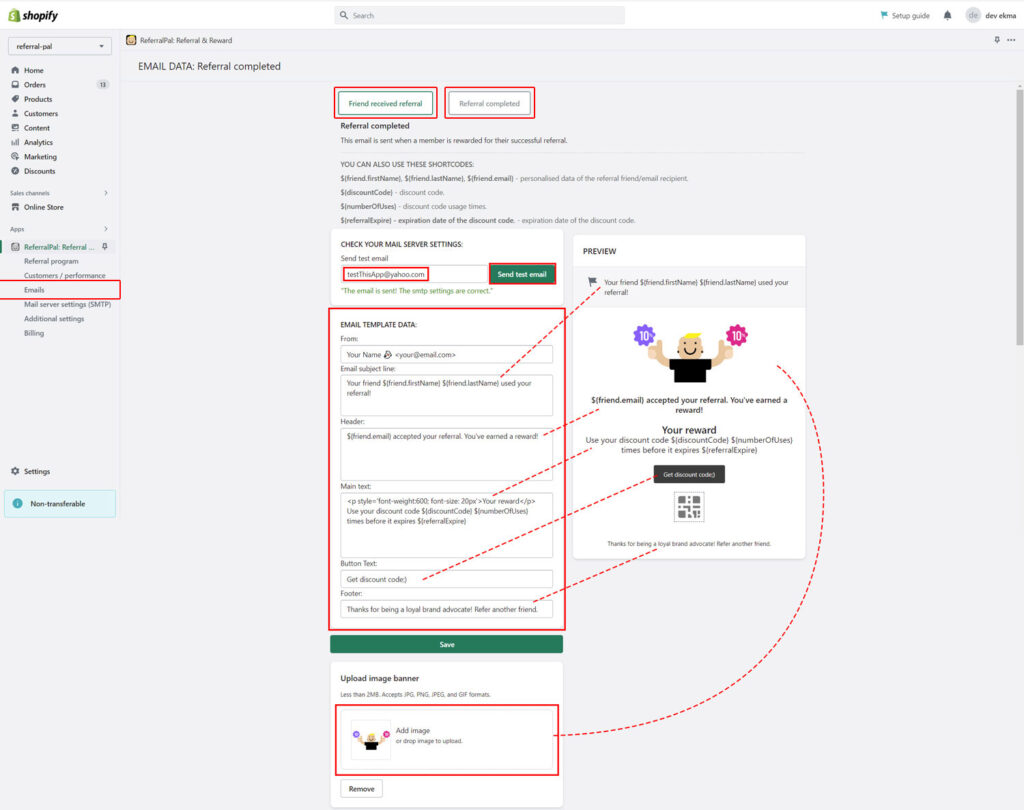
3.1. Click on the ‘Referral completed‘ button on the top of the page. On the page that opens, you should see the settings of the “Referral completed” email. Feel free to change the default data. Also you can upload the header image.
YOU CAN ALSO USE THESE SHORTCODES:

${friend.firstName}, ${friend.lastName},
${friend.email} - personalised data of the referral
friend/email recipient

${discountCode} - discount code

${numberOfUses} - discount code usage times

${referralExpire} - expiration date
of the discount code
3.2. Click on the ‘Save’ button to save the changes that you’ve made.
We recommend that you test the settings of your email template in the ‘Send test email’ block.
Before you use 'Send test email' option,
you should provide the SMTP Settings of your
email server, otherwise the email can't be sent
Now your referrers and referees are notified by email!